DIY Artisanal Bread: The Ultimate Guide to Sourdough
There are few culinary accomplishments as deeply satisfying and profoundly primal as pulling a crackling, mahogany-crusted loaf of naturally leavened bread from your own oven. At Fresh 2 Plate, we champion the return to foundational cooking methods, and none is more historic—or magical—than sourdough baking. Unlike commercial breads built for speed using instant yeast and massive doses of sugar, artisanal sourdough relies solely on wild yeast, bacteria, and the slow march of time. This complex fermentation process breaks down gluten networks and starches, resulting in a significantly more digestible profile that complements a regimen of healthy meals. While it requires patience rather than sheer active labor, creating this Heavenly Delicacy at home is remarkably attainable. By utilizing basic seasonal ingredients (flour and water) and adhering to the rhythm of fermentation, you will never buy a supermarket loaf again. Let’s explore the step-by-step journey of the perfect artisan boule, proving that incredible bread is decidedly one of the most rewarding quick recipes (in active time, at least) you can master.
1. The Engine: Cultivating and Feeding the Starter
A sourdough starter is a living culture of wild yeast and lactic acid bacteria. It is the sole leavening agent and flavor generator for your bread.
- The Genesis: You can cultivate one from scratch by mixing equal parts (by weight) of whole wheat flour and filtered water, letting it sit at room temperature, and discarding half and feeding it daily until it reliably doubles in volume within 4-6 hours. This process generally takes a week.
- The Maintenance: The bacteria in the starter are hungry. If you leave it on the counter, it must be fed daily. If you are a weekend baker, store the starter in the refrigerator and pull it out to feed it twice before attempting to bake.
- The Float Test: Before mixing your dough, test the vitality of your starter. Drop a teaspoon of the bubbly starter into a glass of room-temperature water. If it floats buoyantly, the yeast has produced enough gas, and it is ready to raise bread. If it sinks, it requires another feeding and more time.
Pro Tip: Always weigh your ingredients using a digital kitchen scale. Volumetric measurements (cups) are wildly inaccurate for flour and water equivalents, completely throwing off the “hydration” percentage of your dough.
Nutritional Note: The extended fermentation process of sourdough actively breaks down phytic acid found in wheat. Phytic acid typically inhibits the body’s absorption of minerals; therefore, sourdough makes the nutrients in the wheat significantly more bioaccessible for your healthy meals.
2. Autolyse and Bulk Fermentation
Baking sourdough is not about aggressive kneading; it is about gentle folding and allowing chemistry to do the heavy lifting.
- The Autolyse: Before adding the starter or the salt, mix your flour and water together. Let it rest for 30-60 minutes. This “autolyse” phase fully hydrates the starches and jumpstarts gluten development without any physical effort.
- The Folds: Instead of kneading, you perform a series of “stretch and folds.” During the first few hours of bulk fermentation (rising), gently pull the edges of the dough and fold them over the center every 30 minutes. This aligns the gluten strands and traps the carbon dioxide being produced by the yeast.
- The Rise: The bulk fermentation must occur at room temperature. Depending on your kitchen’s temperature (a crucial “seasonal ingredient” itself), this might take anywhere from 4 to 8 hours. The dough should become billowy, domed at the edges, and show visible bubbles.
Troubleshooting: If your dough remains a flat, soupy puddle after 6 hours, your starter was likely not strong enough when you mixed the batch, or your kitchen environment is simply too cold to encourage yeast activity.
3. The Final Proof and the Bake
The magic of the blistering crust happens during the bake, leveraging intense steam and searing heat.
- The Cold Retard: Shape your dough into a tight round (boule) and place it upside down into a floured proofing basket (banneton). Place the basket into the refrigerator overnight. This “cold retard” drastically slows down the yeast but allows the lactic acid bacteria to produce the signature sour, complex flavor profile of a gourmet dessert or bread.
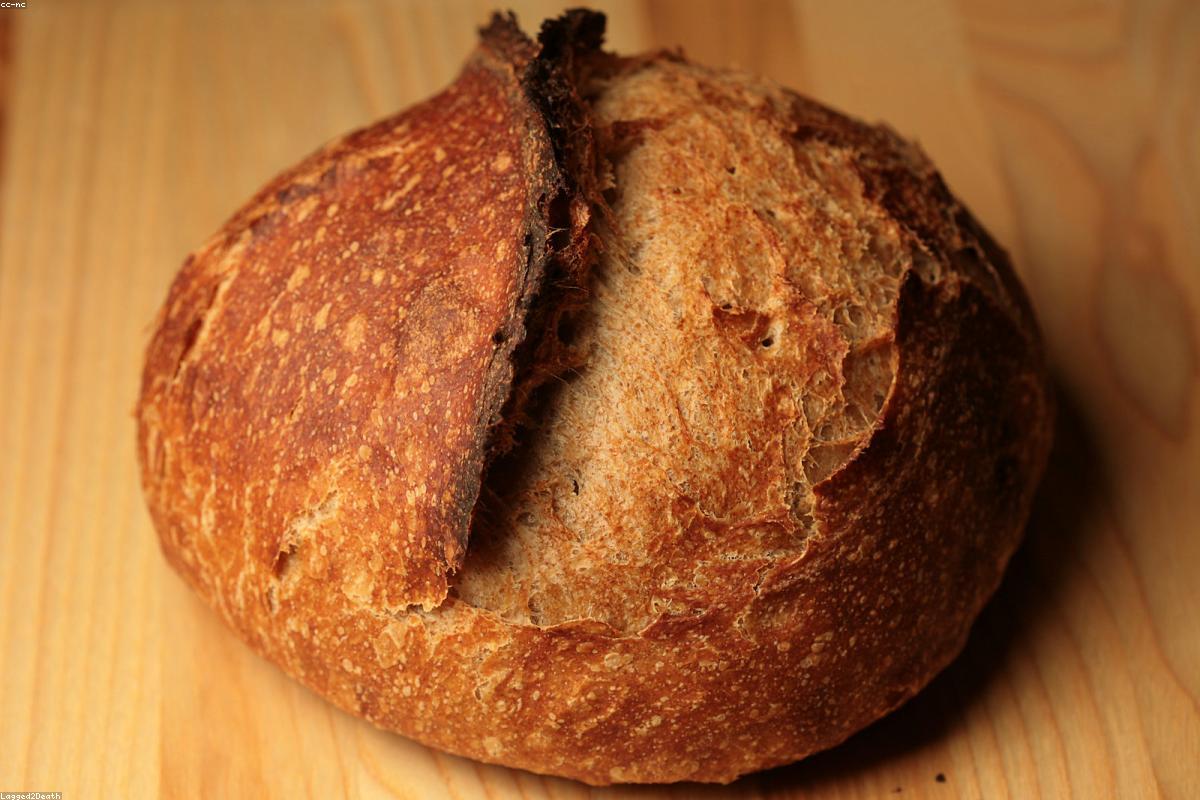
- The Dutch Oven: Professional bakeries inject steam into their ovens to delay the crust from setting, allowing the bread to expand fully (“oven spring”). At home, replicate this by baking your loaf inside a preheated, heavy cast-iron Dutch oven with the lid on for the first 20 minutes.
- The Blistering Finish: Remove the lid for the remaining 20 minutes of baking to allow the crust to dehydrate, developing deep mahogany colors driven by the Maillard reaction.
More Internal Inspiration on Baking Methods
Want to understand the science behind that incredible dark crust? Read our deep dive into Understanding the Maillard Reaction. Or, if you want something sweet to spread on your fresh bread, explore our article on French Patisserie Classics for ideas on fruit curds and jams.
Conclusion
Crafting sourdough is an ongoing dialogue with your ingredients and your environment. By cultivating a strong starter, honoring the slow fermentation process, and utilizing intense, trapped steam during the bake, you participate in an ancient, rewarding culinary tradition. A perfect slice of warm sourdough, requiring only basic seasonal ingredients, elevates any soup or salad into the realm of truly extraordinary healthy meals. While the total timeline spans a day or two, the hands-on quick recipes approach (only 15 minutes of actual labor) yields a Heavenly Delicacy. Nurture your starter, embrace the stretch and fold, and welcome to the addictive world of artisanal home baking!